苹果电脑小技巧。
命令行技巧
- 移动到行首 ctrl+A
- 移动当行尾 ctrl+E
- 往左移一个单词 esc+B
- 往右移一个单词 esc+F
- 删除光标前一个单词 ctrl+W
- 删除光标前所有 ctrl+U
上传rz 下载sz
- 首先下载 iTerm2 因为自带的 terminal 不行啊
- 安装 lrzsz brew install lrzsz , 安装完成后,m1的brew安装位置是在 /opt/homebrew/ ,需要 copy 到
1
2
3M1 需要
cd /opt/homebrew/bin
cp sz /usr/local/bin/ cp rz /usr/local/bin/ - 下载两个脚本 send-zmodem.sh recv-zmodem.sh如果链接失败,可以复制以下文件
1
2
3
4
cd /usr/local/bin
sudo wget https://gist.githubusercontent.com/sy-records/1b3010b566af42f57fa6fa38138dd22a/raw/2bfe590665d3b0e6c8223623922474361058920c/iterm2-send-zmodem.sh
sudo wget https://gist.githubusercontent.com/sy-records/40f4ba22e3fbdeedf58463b067798962/raw/b32d2f7ac3fa54acca81be3664797cebb724690f/iterm2-recv-zmodem.sh
sudo chmod 755 /usr/local/bin/iterm2-*1
2
3
4
5
6
7
8
9
10
11
12
13
14
15
16
17
18
19
20
21
22
23
24
25
26
27
28
29
30
31
32
33
34
35
36
37
38
39
40
41
42
43
44
45
46
47
48
49
50
51
52
53
54
55
56
57
58#vim /usr/local/bin/iterm2-send-zmodem.sh
#!/bin/bash
# Author: Matt Mastracci (matthew@mastracci.com)
# AppleScript from http://stackoverflow.com/questions/4309087/cancel-button-on-osascript-in-a-bash-script
# licensed under cc-wiki with attribution required
# Remainder of script public domain
osascript -e 'tell application "iTerm2" to version' > /dev/null 2>&1 && NAME=iTerm2 || NAME=iTerm
if [[ $NAME = "iTerm" ]]; then
FILE=`osascript -e 'tell application "iTerm" to activate' -e 'tell application "iTerm" to set thefile to choose file with prompt "Choose a file to send"' -e "do shell script (\"echo \"&(quoted form of POSIX path of thefile as Unicode text)&\"\")"`
else
FILE=`osascript -e 'tell application "iTerm2" to activate' -e 'tell application "iTerm2" to set thefile to choose file with prompt "Choose a file to send"' -e "do shell script (\"echo \"&(quoted form of POSIX path of thefile as Unicode text)&\"\")"`
fi
if [[ $FILE = "" ]]; then
echo Cancelled.
# Send ZModem cancel
echo -e \\x18\\x18\\x18\\x18\\x18
sleep 1
echo
echo \# Cancelled transfer
else
/usr/local/bin/sz "$FILE" -e -b
sleep 1
echo
echo \# Received $FILE
fi
#vim /usr/local/bin/iterm2-recv-zmodem.sh
#!/bin/bash
# Author: Matt Mastracci (matthew@mastracci.com)
# AppleScript from http://stackoverflow.com/questions/4309087/cancel-button-on-osascript-in-a-bash-script
# licensed under cc-wiki with attribution required
# Remainder of script public domain
osascript -e 'tell application "iTerm2" to version' > /dev/null 2>&1 && NAME=iTerm2 || NAME=iTerm
if [[ $NAME = "iTerm" ]]; then
FILE=`osascript -e 'tell application "iTerm" to activate' -e 'tell application "iTerm" to set thefile to choose folder with prompt "Choose a folder to place received files in"' -e "do shell script (\"echo \"&(quoted form of POSIX path of thefile as Unicode text)&\"\")"`
else
FILE=`osascript -e 'tell application "iTerm2" to activate' -e 'tell application "iTerm2" to set thefile to choose folder with prompt "Choose a folder to place received files in"' -e "do shell script (\"echo \"&(quoted form of POSIX path of thefile as Unicode text)&\"\")"`
fi
if [[ $FILE = "" ]]; then
echo Cancelled.
# Send ZModem cancel
echo -e \\x18\\x18\\x18\\x18\\x18
sleep 1
echo
echo \# Cancelled transfer
else
cd "$FILE"
/usr/local/bin/rz -E -e -b
sleep 1
echo
echo
echo \# Sent \-\> $FILE
fi - iTerm2 的配置
点击 iTerm2 的设置界面 Perference -> Profiles -> Default -> Advanced -> Triggers 的 Edit 按钮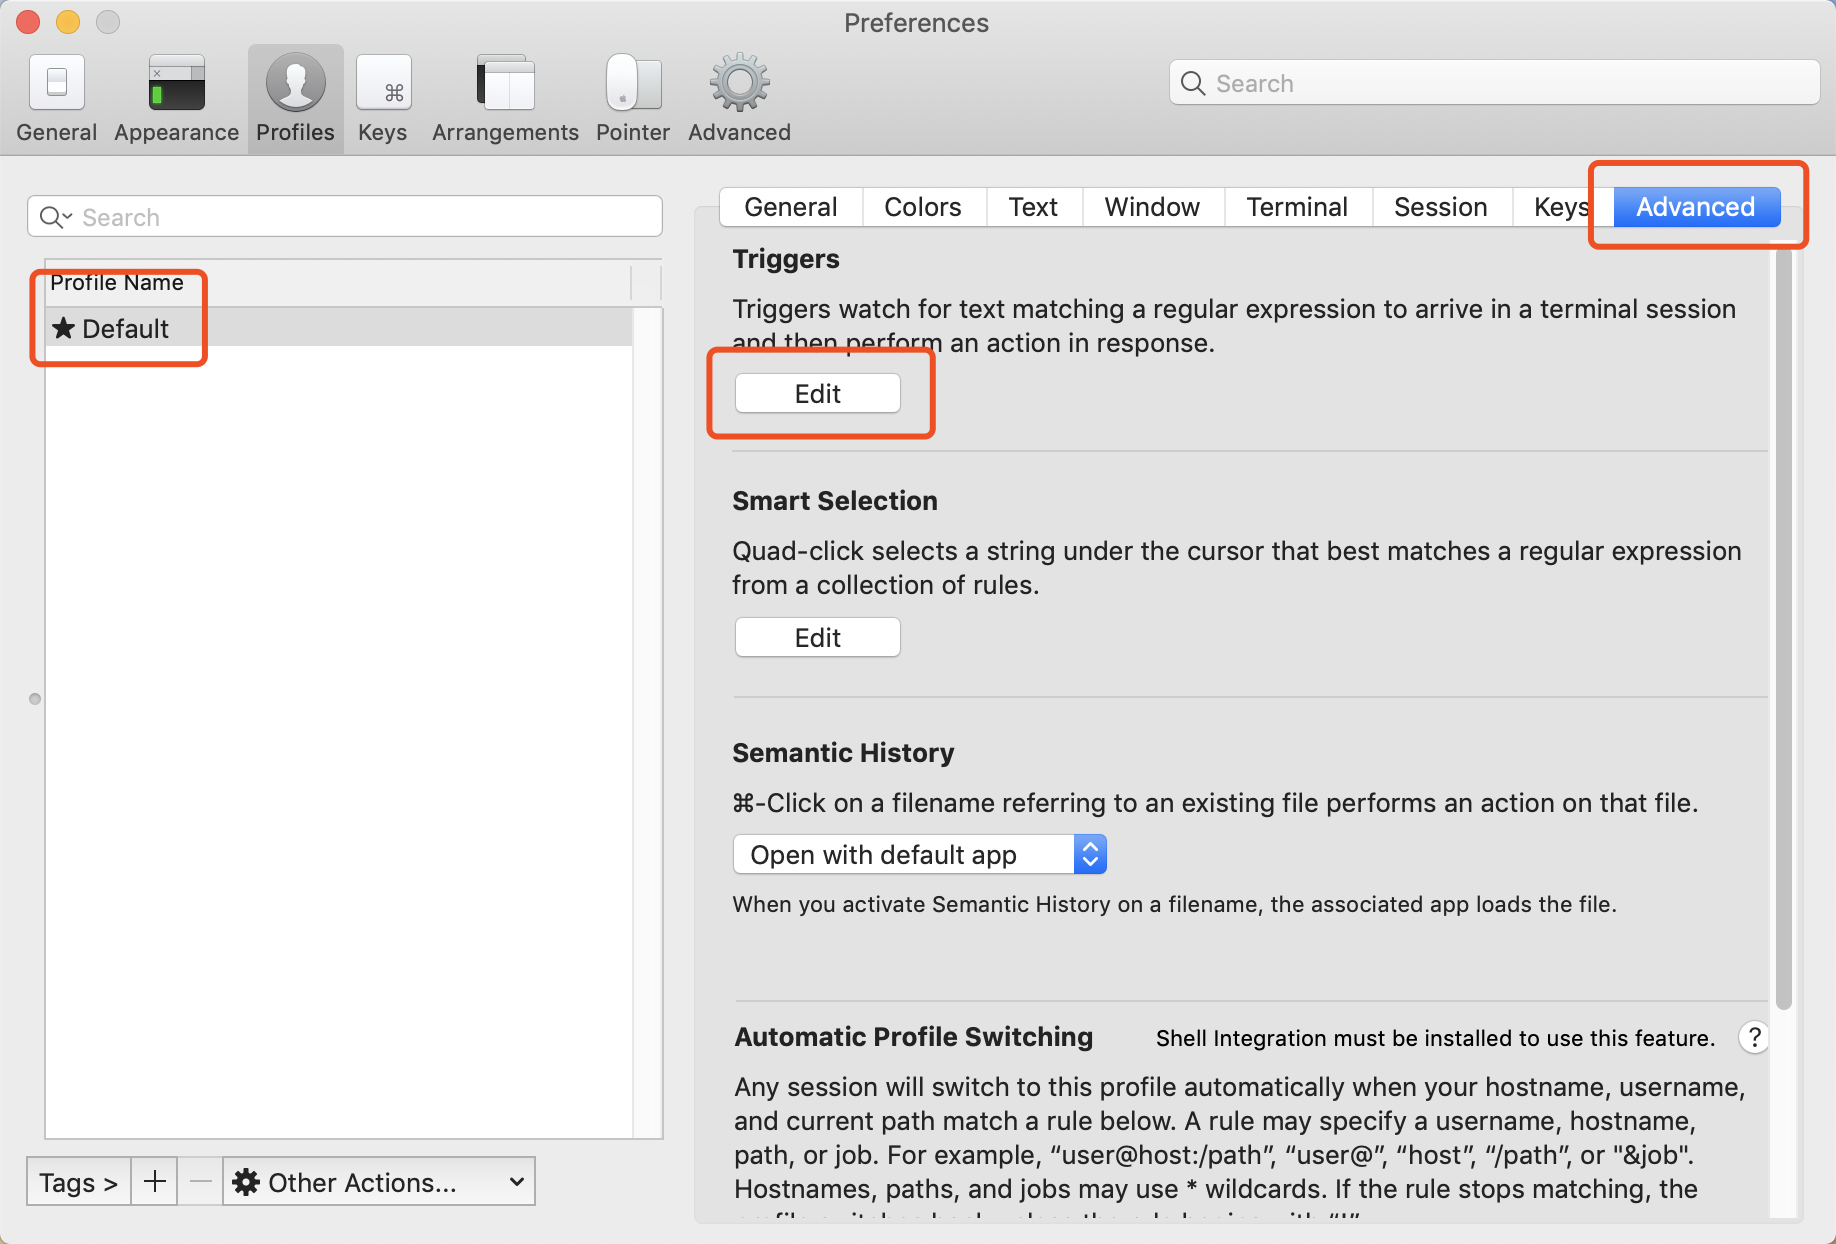
点击+号,添加如下的参数添加完成如下图所示1
2
3
4
5
6
7
8
9Regular expression: \*\*B0100
Action: Run Silent Coprocess
Parameters: /usr/local/bin/iterm2-send-zmodem.sh
Instant: checked
Regular expression: \*\*B00000000000000
Action: Run Silent Coprocess
Parameters: /usr/local/bin/iterm2-recv-zmodem.sh
Instant: checked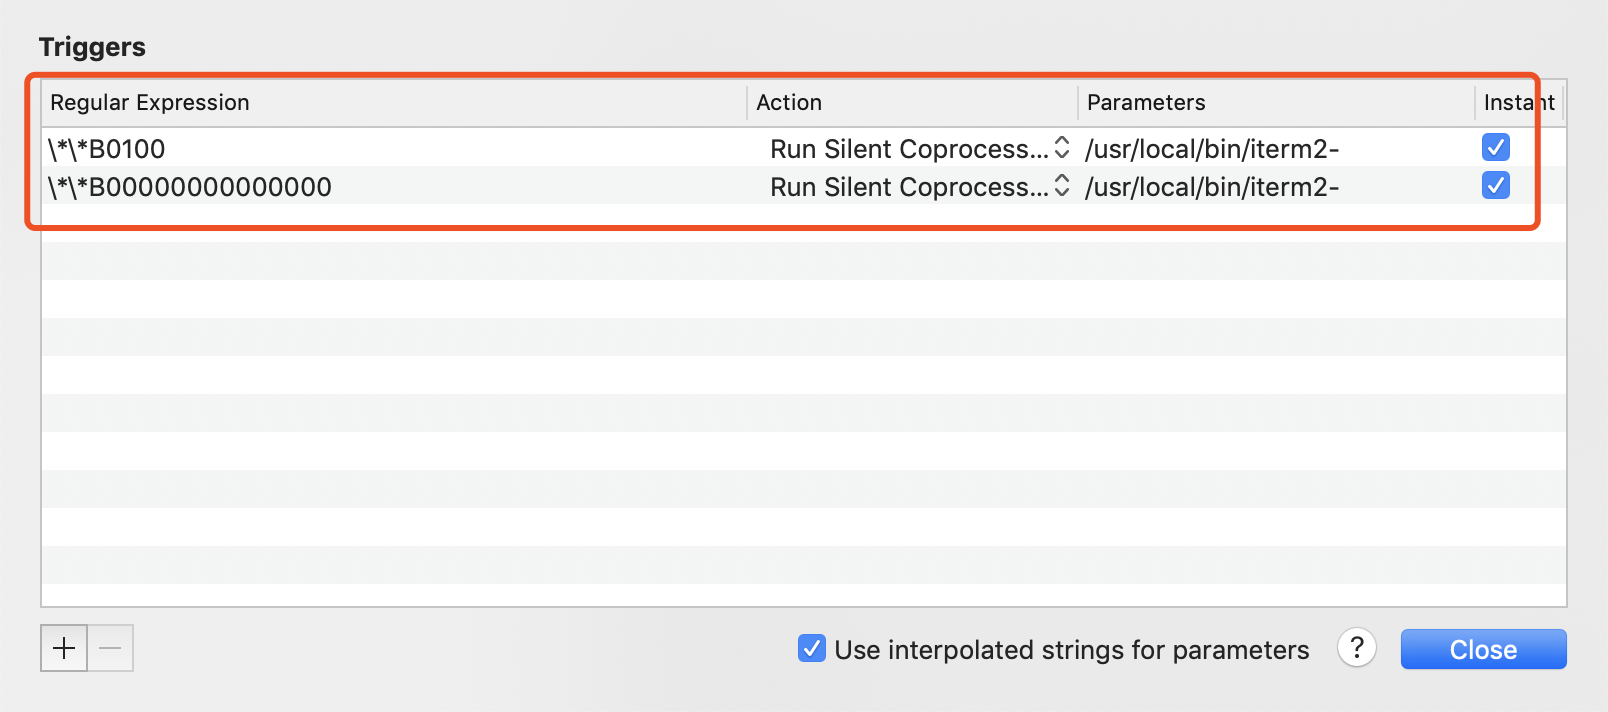
简单的用法,当 ssh 登录后1
2
3
4
5
6
7
8
9
10# 下载一个文件:
sz filename
# 下载多个文件:
sz filename1 filename2
# 下载dir目录下的所有文件,不包含dir下的文件夹:
sz dir/*
# 直接键入rz命令即可
rz
# 在弹出的文件窗口,选择需要上传的文件
遍历子目录更新 git
- https://www.itranslater.com/qa/details/2123046276676715520
- https://mp.weixin.qq.com/s/J-FQc150eoNvt3ZoSv_kfg
1 | find . -type d -depth 1 -exec git --git-dir={}/.git --work-tree=$PWD/{} pull origin master \; |
brew
https://brew.sh/ Mac 上面最好用的软件管理工具。
mac上使用brew install /brew cask install安装软件总是先updating HomeBrew…
HomeBrew 关闭自动更新, 减少等待的时间
1 | vim ~/.zshrc |
更稳妥的办法是固定版本
1 | brew pin python@3.9 |
固定好之后,python 就不会被自动更新了。之前遇到过 brew 自动更新了 python 从 3.7 到 3.9 导致了 pycharm 创建的虚拟环境都不能用了。
.zshrc
mac 常用的小脚本, 顺便安利一下大佬的 bash 教程
1 | export HOMEBREW_NO_AUTO_UPDATE=true |
我们来亲测一下 ec2 [name] [awscli profile]
1 | feiyang@MAC ~ % ec2 stg-hako |
关于上面的 AWS CLI 如果不想要返回的结果用 less 浏览,可以禁用 pager
The following example sets the default to disable the use of a pager.
1 | # ~/.aws/config |
curl 计时
- time 变量的含义
- get curl response time
1
2
3
4
5
6
7
8
9
10
11
12➜ ~ curl "http://127.0.0.1:5000/v1/wdmanager?user_email=feiyang%40feiyang233.club" -w %{time_connect}:%{time_starttransfer}:%{time_total}
{
"manager": "manager_name"
}
0.000300:34.109901:34.110209%
# 有了缓存就是快啊
➜ ~ curl "http://127.0.0.1:5000/v1/wdmanager?user_email=feiyang%40feiyang233.club" -w %{time_connect}:%{time_starttransfer}:%{time_total}
{
"manager": "manager_name"
}
0.000295:0.004138:0.004199%
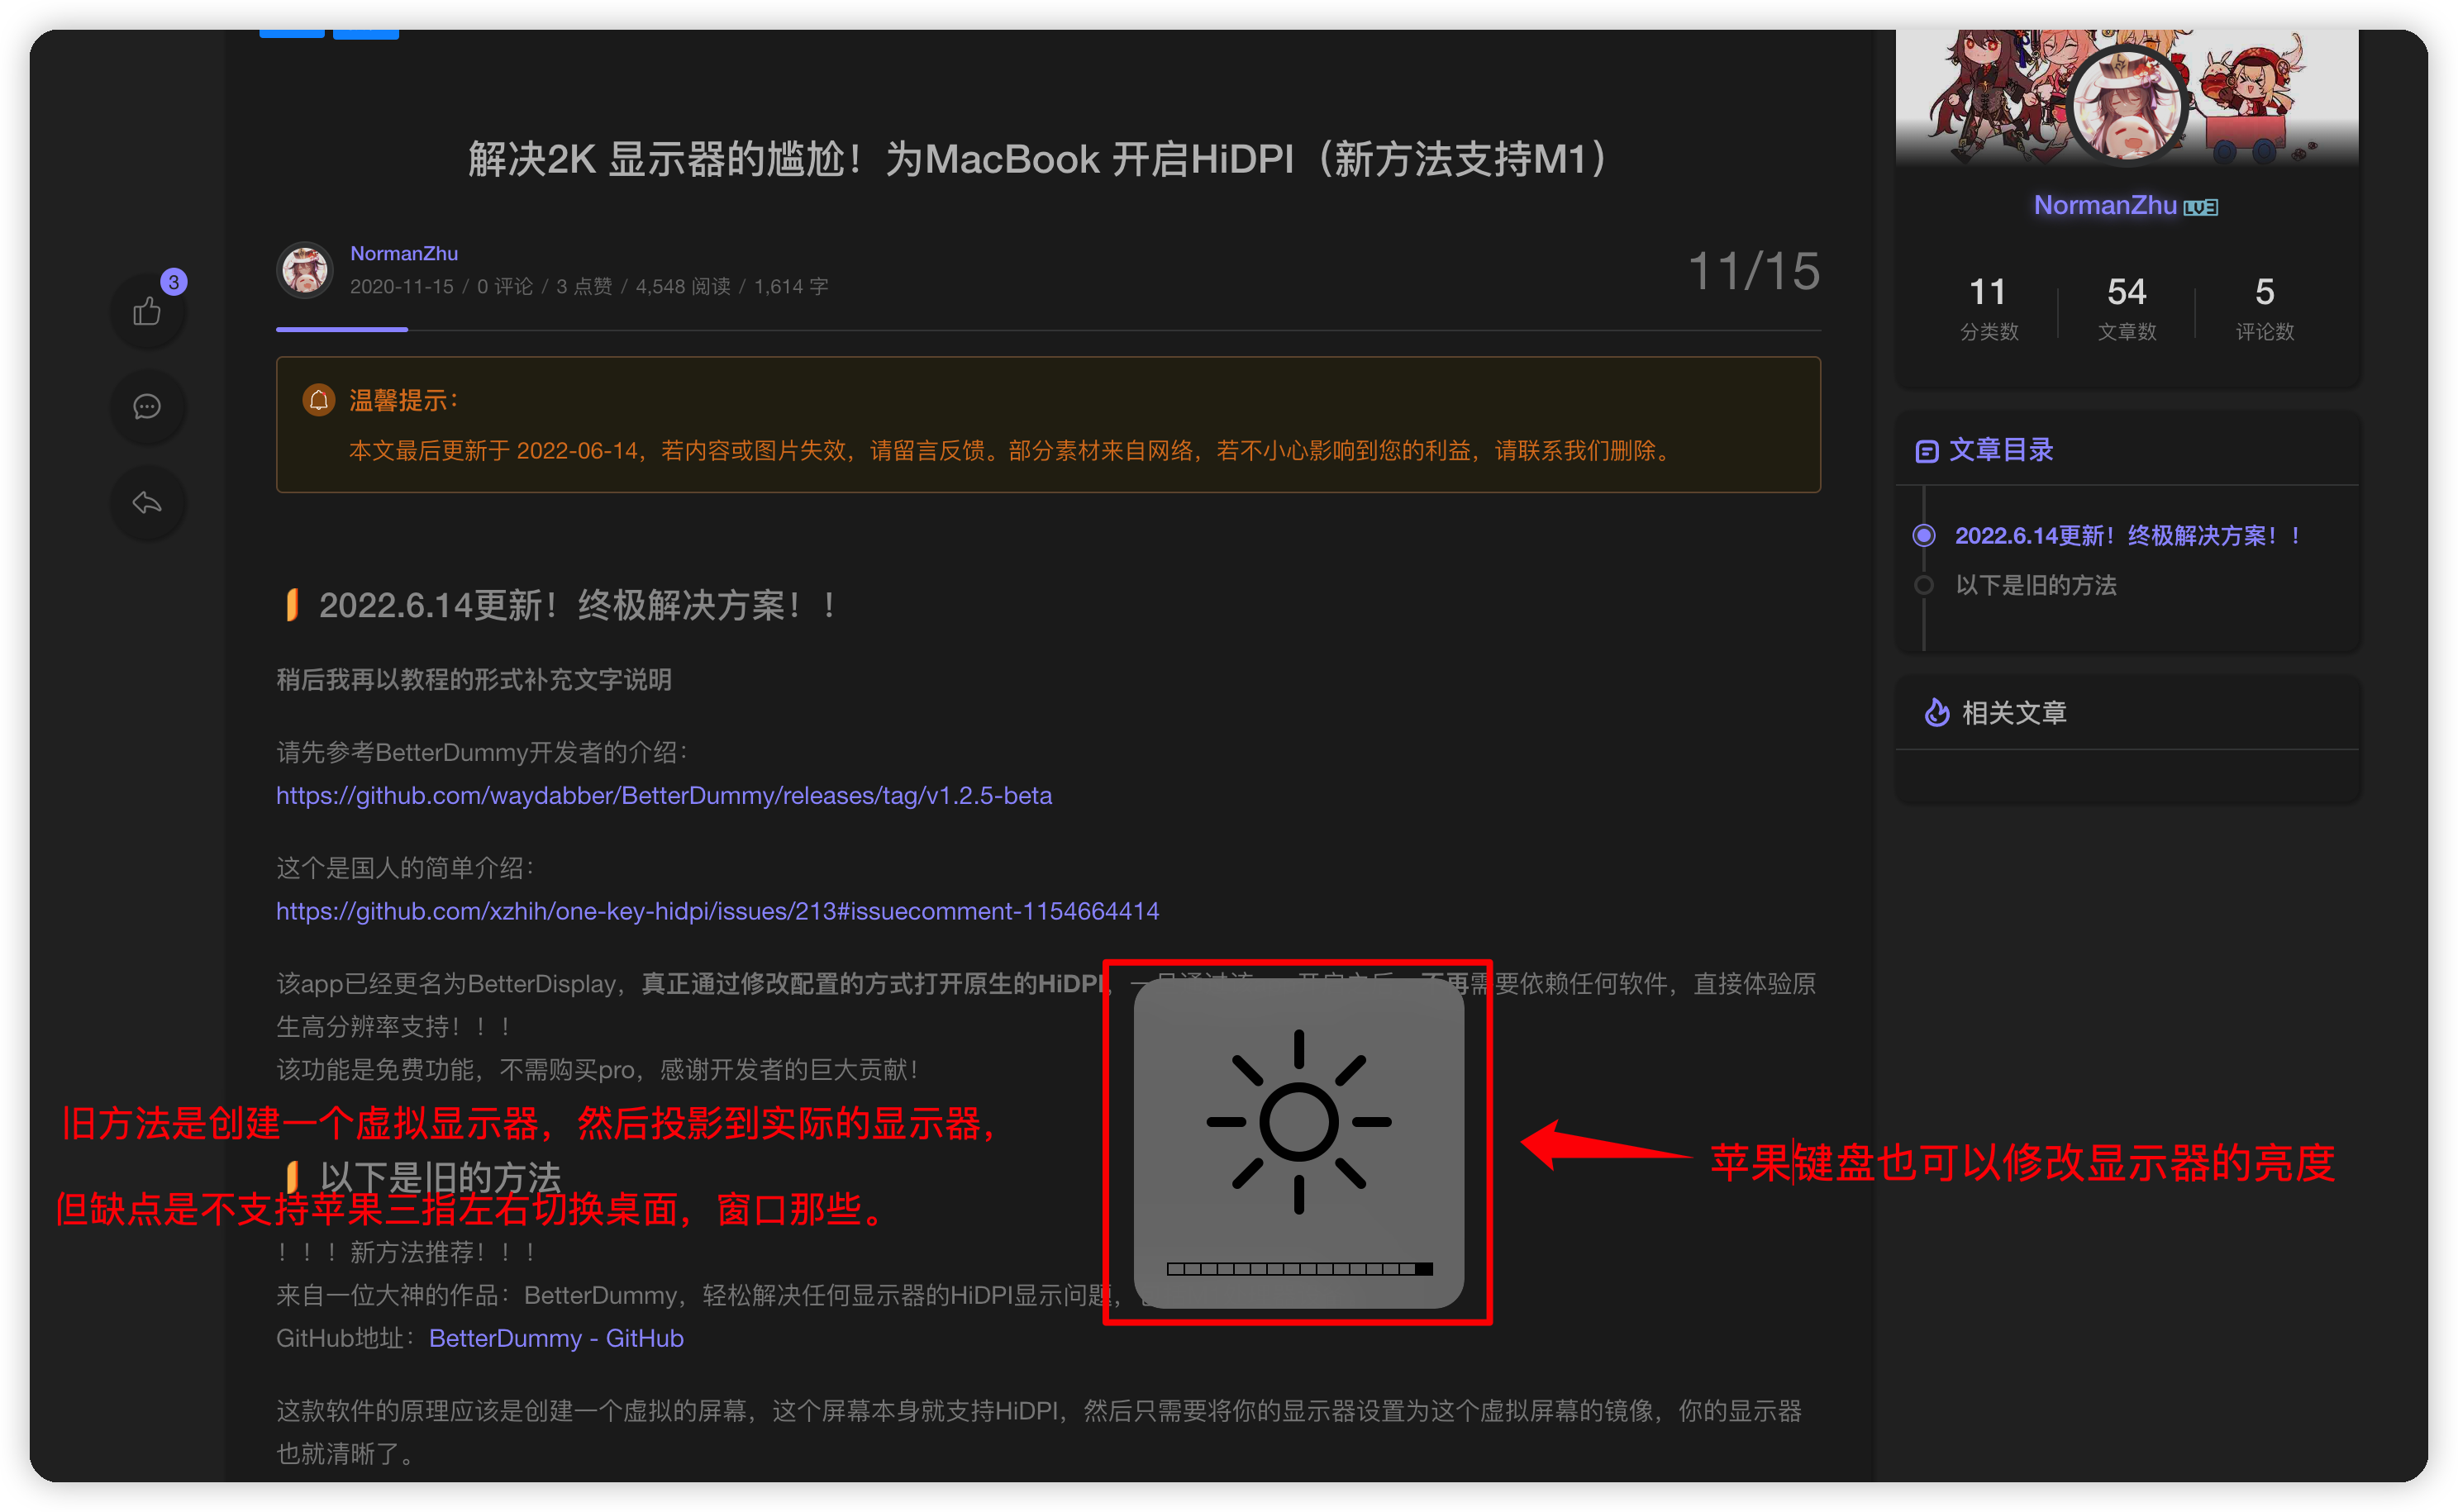
2K 显示器 HiDPI
- intel 可以尝试这个方法 https://blog.csdn.net/qq_37417018/article/details/113701115
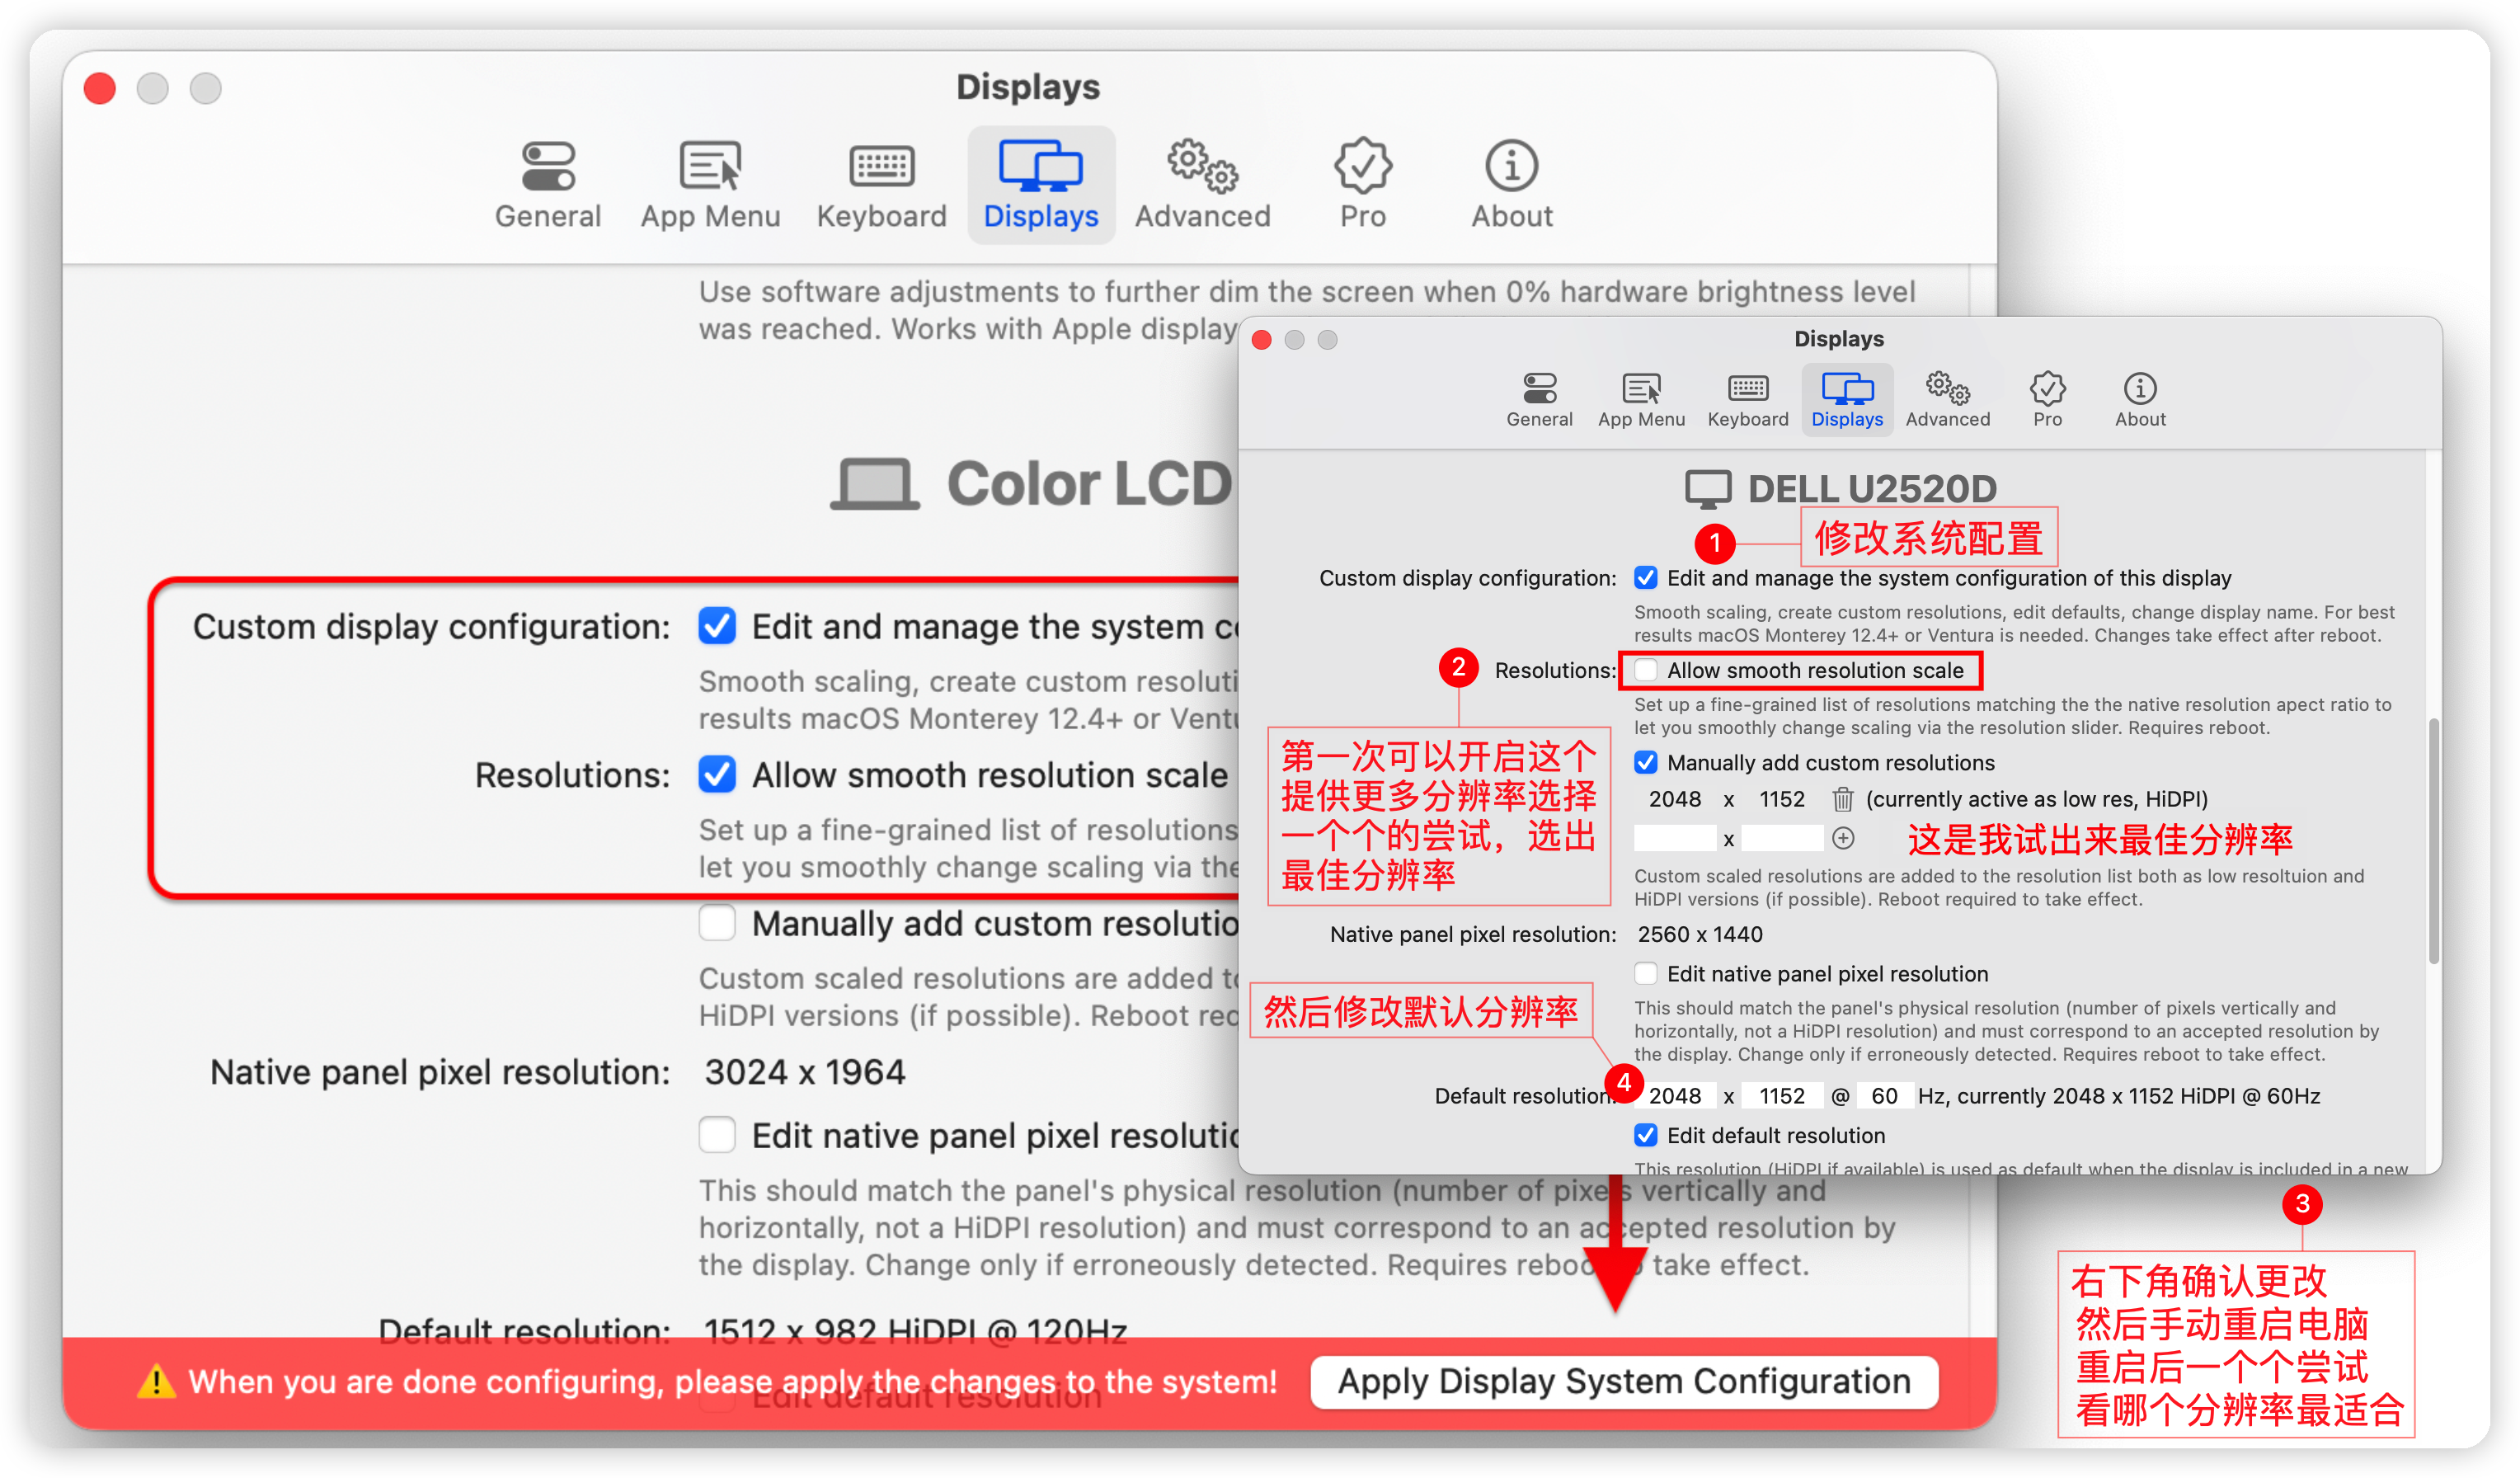
- M1 芯片可以用这个方法 https://sspai.com/post/70141 普通版就可以,不需要 Pro 的高级功能。但 2022-06-19 今天它更新了,不需要 dummy 投影来修改分辨率了。
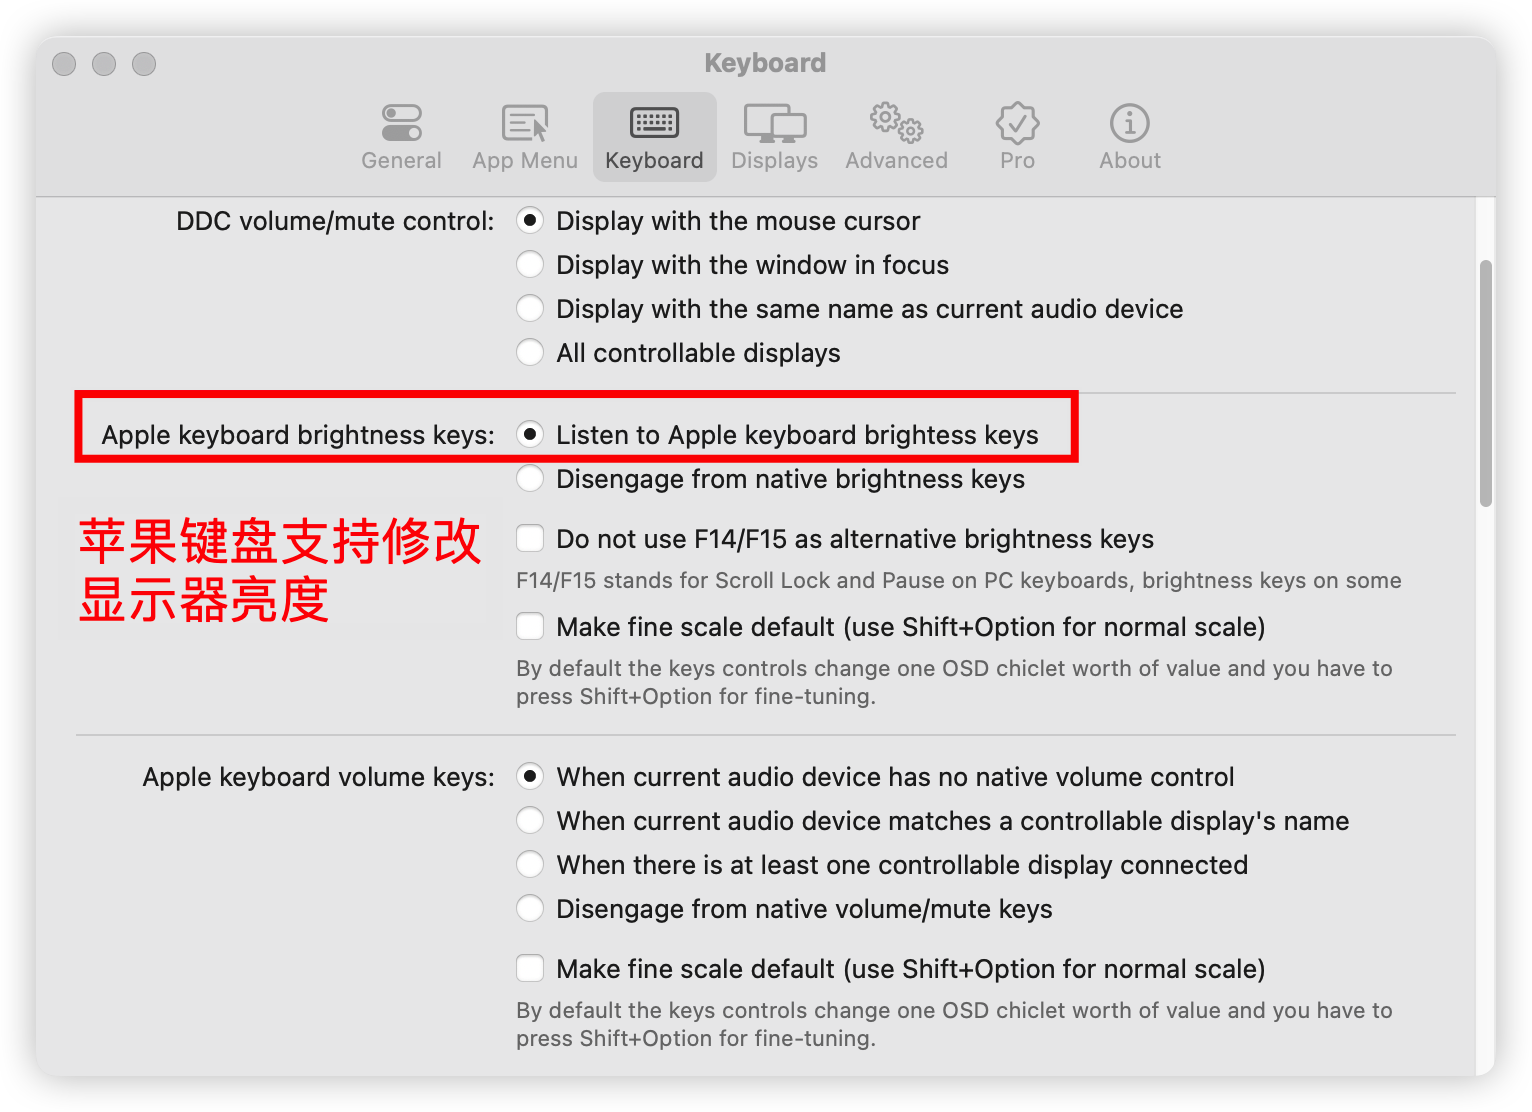
而且还支持键盘控制多个屏幕的亮度,修改默认分辨率等高级功能, 真心建议 15 美元买 Pro 版本。 这篇文章也有介绍 https://zzbloc.top/archives/turn-on-hidpi-for-macbook
关于显示器亮度: 软件上默认最大亮度是你的显示器按键设置的当前值,比如我的显示器按键设置当前值为60%,用 BetterDisplay 控制亮度时,最大值就是60%,我可调整的区间为0-60%,而不能增加到60%以上